
Create Amazing Silhouettes
by Joe Hendricks
Silhouettes are one of my favorite ways to be creative, whether I’m photographing people or “still life.” This guide will teach you the basic rules for creating stunning, creative silhouettes.

Let’s get started!
Tip #1 - Expose for the light behind your subject.
When you expose for the light behind your subject, it makes everything in front of the light look dark, creating a silhouette. In all the silhouettes you see in this tutorial, the sky is very well exposed. If you expose for the subject matter, the background will be “washed out” or too bright.
When is the best time to take silhouette photos? Sunrise and sunset are the most “foolproof” times, but you can really shoot any time of day, as long as the main light source is behind your subject.
Tip #2 - Make sure your photo clearly shows the shape of your subject.
Since you can’t see your subjects, you have to exaggerate its characteristics and show some separation from other objects or people.
A) If your silhouette is a person, have them turn their face sideways, so you can see the shape of their nose, mouth and chin. It also helps to have them doing an action, like walking, jumping, dancing, etc., making sure there’s clear separation of the arms and legs from their body. Otherwise, they are going to look like a dark blob in the picture (see example at the end of this tutorial).
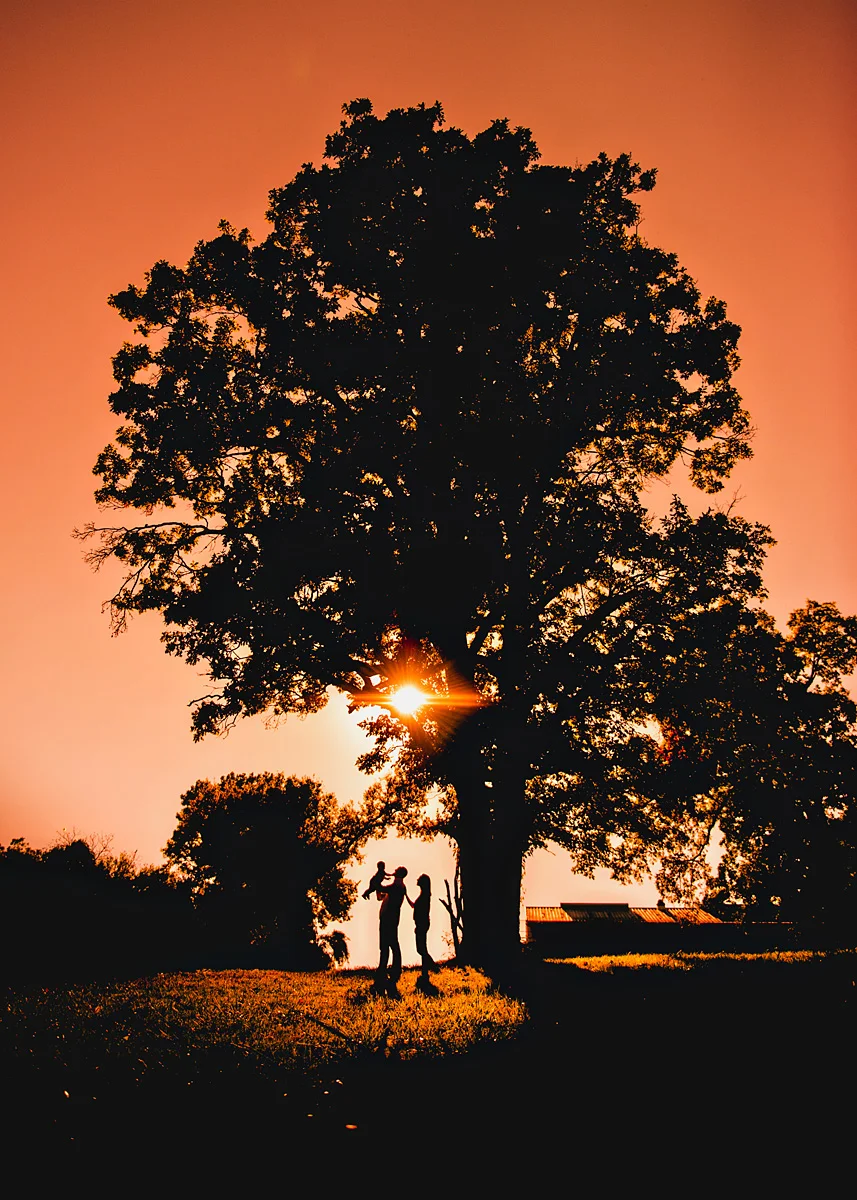
B) When shooting something static, like a sign, tree or car, you want to know exactly what you are looking at. The best way to do this, is to include as much of the subject in the silhouette as possible. For example, if you’re photographing a tree, makes sure you get as much of the tree trunk as possible. Otherwise, it just looks like a bush.
Tip #3 - Get Low!

Probably 95% of the time I take a silhouette, I’m laying on the ground with my camera as low as I can possibly get it. The lower you are, the more of your subject you’re going to see. Having your subject on top of a hill is the easiest situation, but you can create a very low profile, just by getting your camera low.
Tip #4 - Pay attention to your background.
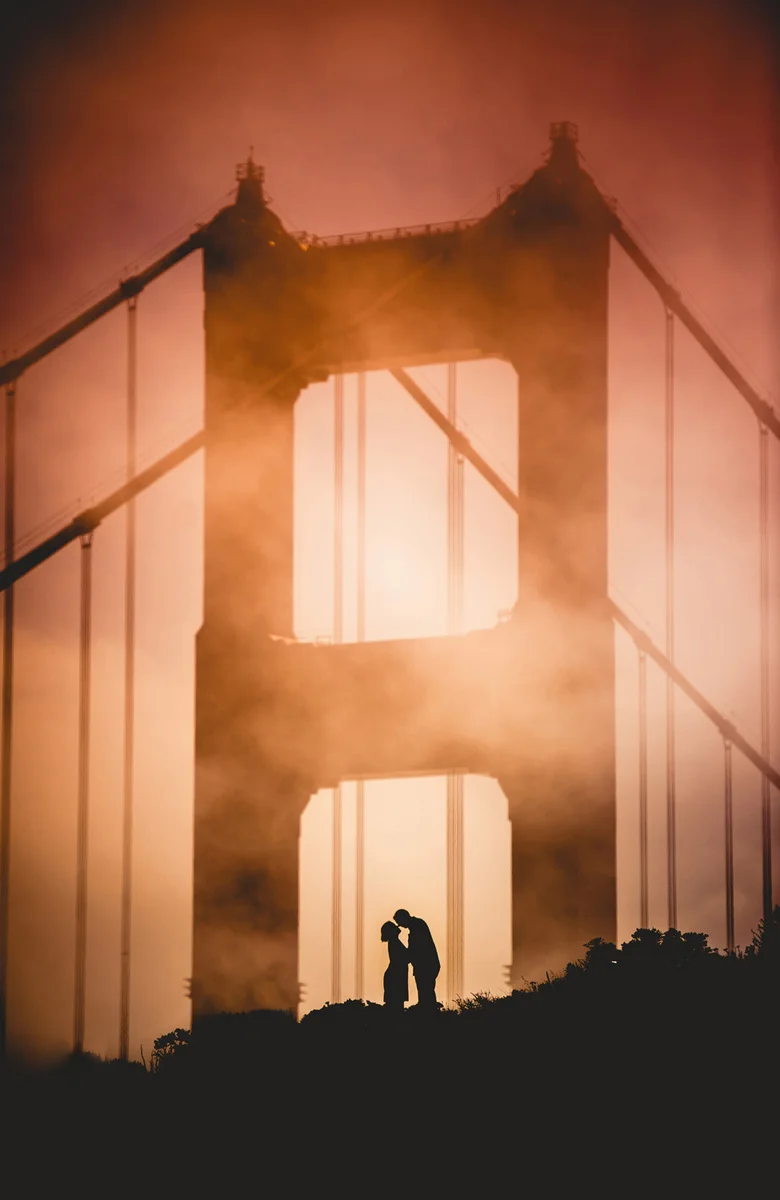
The biggest mistake many photographers make when creating a silhouette, is that the subject runs into something else. In other words, if I take a silhouette picture of a couple in front of the Golden Gate Bridge (example at right), and I have vertical support cables going through their bodies, it’s going to look odd. Instead, by moving over a foot, my couple now looks balanced in middle of the cables. If there is no separation from them, it will be distracting. The same rule applies for trees coming out of peoples heads, or signs with something behind them. You background needs to be clean
Camera Setting Tips
The easiest way to explain this is: Lock your camera’s exposure on the background. - iPhone (or similar phone cameras): simply touch the sky in the background.
- Point and shoot cameras: leave your camera in auto mode.
- DSLRs: Put your camera in the “aperture priority” setting for Nikon, or “AV” for Canon. If you shoot in manual, dial your ISO down as low as possible and raise your shutter speed. You will probably have to make minor adjustments from there, but only change your shutter speed if you can.
- No matter what camera you're using, having a low ISO is key to a good silhouette. What is ISO? Basically, its your film speed. The lower your film speed, the more light you can let it to your camera.
Conclusion
You want your subject to stand out from the background. Look for a bright sky behind them, and shoot into the sun (preferably sunrise or sunset), and make sure you’re showing as much of your subject as possible by getting as low as you can. Give the subject plenty of separation from the background so there’s no confusion about what the picture is of. Turn them left or right to show even more detail if you need to. Silhouettes are so much fun to shoot and people are always amazed when you show them one! So go out, get low, and have fun!
Example of separation and showing a profile of people


In the first image (on the left), the family is clumped together facing me. How many people do you think are in this image? It looks like 4, but there are 5. The baby is in the mothers’ arms. You can barely see his head poking out. To fix this, I had the family walk from left to right in a straight line with the father holding the baby in the air!